 |
|

COBRA Scanner

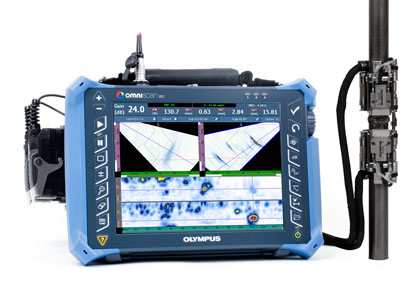
The COBRA™ manual scanner, combined with the OmniScan® PA flaw detector, is used to perform circumferential weld inspections on small-diameter pipes. The COBRA holds up to two PA probes for inspections on pipes with outside diameters ranging from 0.84 in. to 4.5 in.
With its very slim design, this manual scanner inspects pipes in limited access areas where minimal clearance is required. Adjacent obstructions, such as piping, supports, and structures, can be as close as 12 mm (0.5 in.). This spring-loaded scanner is designed to clasp carbon steel and stainless steel pipes of various diameters using multiple link. This unique feature enables the scanner to be installed and operated from one side of a row of pipes.The COBRA scanner is characterized by its smooth-rolling encoded movement, which enables precise data acquisition. The scanner holds up to two phased array probes for complete inspection of the weld in one pass. For pipe-to-component inspections, the scanner can be configured quickly to perform one-sided inspections using a single probe.
This Olympus solution uses low-profile phased array probes with optimized elevation focusing, which enhances detection of small defects in thin-wall pipes. Specially designed low-profile wedges fitting each pipe diameter covered by the scanner are also available for a complete solution. The COBRA scanner ensures stable, constant, and strong pressure, thus providing good UT signals and precise encoding around the full circumference of the pipe.

The COBRA scanner on a 0.84 in. pipe with two A15 PA probes, Y-adaptor splitter, and an OmniScan MX2 16:64 displaying two PA groups.

The solution uses low-profile phased array probes with optimized elevation focusing, which improves the detection of small defects in thin-wall pipes.

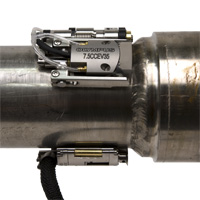
The COBRA scanner can also be configured for pipe-to-component weld inspections.
- Covers standard pipes from 0.84 in. to 4.5 in. OD (21 mm to 114 mm).
- Operates within 12 mm (0.5 in.) clearance (on all standard pipes), permitting inspections in limited access areas.
- Holds up to two phased array probes for complete weld coverage in one pass.
- Easy installation and manipulation from one side of a row of pipes.
- Can be configured to perform one-sided inspections for pipe-to-component evaluations.
- The included mechanical setup templates eliminate the need for pipe samples when preparing the scanner for standard pipes.
- The design provides stable and constant pressure around the full circumference of the pipe.
- Urethane wheels provide smooth radial movement and limited axial drift.
- Encoder resolution of 32 steps/mm.
- Compact, lightweight, and portable.
- Wedges and probes can be changed quickly and easily.
- The distance between probes can be adjusted from 0 mm to 55 mm.
- The spring-loaded scanner can be used on ferromagnetic and nonferromagnetic pipes.
- Waterproof and rust free.
1. What is the minimum wall thickness that can be inspected with the COBRA on the smallest diameter pipe size?
We can't give an exact number for the wall thickness. It is too closely related to the defects, material type, noise in the material, and the operator's ability. The customers need to make their own tests because we cannot guarantee the performance for their specific applications. Small diameters lose a lot of power on each skip and thin wall pipe required multiple steps to cover wide welds. This combination can become a problem with very small and thin pipes. Unfortunately, we cannot give a number that will work in every situation without being too conservative.
2. Is the COBRA scanner AUT code compliant?
A definite "yes "! Scanners and instruments are one part of an overall procedure or process, which has been written to comply with the various codes. They contain features such as scan speed, encoder capability, instrument linearity, software options, and data recording that make up the equipment portion of the overall process.
COBRA helps you achieve inspection compliance for:
- ASME CC 2235
- ASME B31.3 CC 181
- ASME B31.1 CC 179
3. Can the COBRA scanner inspect pipe-to-component welds?
Yes, if the straight portion on each side of the weld is long enough, it is possible to carry out the inspection using two probes. If not, the scanner can be dismantled to perform the inspection from one side of the weld.
4. What is the straight-pipe length needed on each side of the weld to perform an inspection with the Cobra?
59 mm of straight pipe is needed for each side. From the center of the weld, the dimension needed on each side is: 59 mm + half of the weld width.
Ελ. Βενιζέλου 7 & Δελφών, 14452 Μεταμόρφωση, Αθήνα, Ελλάδα |


